Stage I: Scientific Photography of Space Plants 📷🌱
Before we can study how plants grow in space, we need to see them clearly — and record what we see in a way that a computer (and other scientists) can measure. In this first stage you'll learn the difference between a quick snapshot and a real science photograph. It's a skill you'll use in every stage that follows.
What you'll learn
- Why scientists photograph their experiments in a careful, repeatable way.
- How to set up a camera, lights, background, and a scale bar.
- How a computer "reads" your photo to measure a plant automatically.
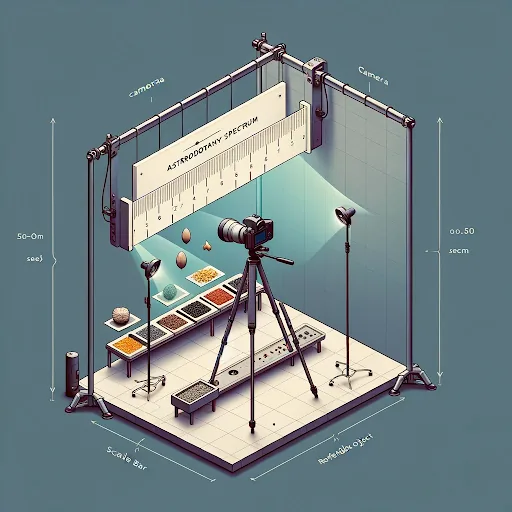
A snapshot vs. a science photo
A phone snapshot is made to look nice. A science photo is made to be measured and compared — by you today, by you next week, and by a researcher on the other side of the planet. The trick is to keep everything the same every time except the plant itself.
Remember the 4 C's:
| What it means | Why it matters | |
|---|---|---|
| Contrast | Plain background that stands out from the plant (black felt is usually best). | A computer can find the edge of the plant easily. |
| Composition | One plant near the centre, nothing overlapping it. | Measurements aren't confused by other objects. |
| Consistency | Same distance, same lighting, same angle every time. | Photos can be fairly compared to each other. |
| Calibration | A scale bar of known size in the photo. | Turns "pixels" into real centimetres. |
Setting up your shot
- Camera: mounted perpendicular (straight-on) to the plant, on a tripod or stand so it doesn't move between photos.
- Lighting: two soft light sources at 45° angles to reduce glare and shadows. Keep the light colour the same every time (don't mix daylight and a red grow-light).
- Background: a plain, non-reflective surface — black felt or card works well.
- Scale bar: place a ruler or the AstroBotany Spectrum sticker in the same plane as the plant, off to one side.
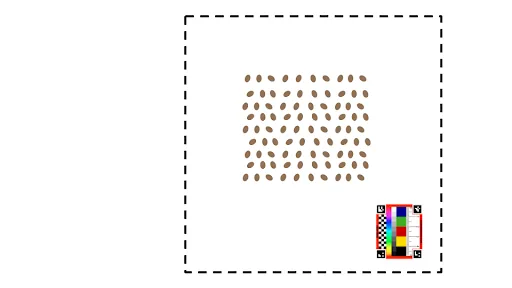
Quick-start checklist
- Camera on a tripod, pointing straight down/at the plant
- Plain, contrasting background behind the plant
- One plant near the centre, nothing overlapping
- A scale bar (ruler or Spectrum sticker) in the frame
- Same distance and lighting as your last photo
- Save the photo with the plant name, date, and time
The AstroBotany Spectrum: your "AstroCalibration" marker
The AstroBotany Spectrum is a small printed sticker that does two jobs at once:
- Scale — it's a known physical size, so software can convert pixels into real centimetres.
- Colour — it carries reference colour chips, so software can colour-correct your photo (so a leaf looks the same shade whether you shot it at noon or under a lamp).
Because it calibrates both size and colour, we call it an AstroCalibration marker. Put one in the corner of every photo, keep it flat (mount it on card or tile) and in the same plane as the plant. Tools like PlantCV can find it automatically — which is exactly how the Stage III and Stage IV measurement protocols turn your photos into data.
Get your stickers
AstroBotany calibration (AstroCalibration) stickers are available from Sticker Mule → stickermule.com/drb2025.
Tools that "read" your photos
You don't measure by hand — these free tools do it for you:
- PlantCV — plant-specific computer vision. It can detect the
AstroCalibration marker, colour-correct the image, and measure your plant. See the
step-by-step protocols:
- Green Area Index with PlantCV (Stage III)
- Root System Architecture with PlantCV (Stage IV)
- ImageJ / Fiji — the classic scientific image-measuring tool.
- SOAPP — a student-friendly app that works with the Spectrum sticker.
- Easy Leaf Area — measures leaf area from a photo (used in Stage III).
Classroom activity: measure your learning
Teachers can run a quick two-stage survey (a Google Form works well) — once before and once after the photography session — to see how much students' confidence and skill grew. The full set of questions and a step-by-step educator guide are in the detailed guide below.
Read the full AstroBotany Photography Guide (SOP)
Next stop
Once you can take a clean, measurable photo, you're ready to put it to work in Stage II: What's Your Favorite Microgreen? and Stage III: Growing Microgreens.